If you want to Make Headgear at home, the first step is understanding its purpose. Headgear can serve many functions, including fashion, cultural expression, costume design, or light sports use. Because different purposes require different materials and structures, planning ahead helps you achieve the right result.
When you Make Headgear for casual or decorative use, you can rely on basic sewing tools and fabric. However, if the headgear is intended for medical or orthodontic treatment, it must be professionally prescribed and fitted. This guide focuses only on safe, fabric-based headgear suitable for costumes, events, and everyday wear.
Learning how to Make Headgear is straightforward once you break the process into simple steps. With accurate measurements, the right materials, and careful assembly, you can create a comfortable and stylish piece that fits properly.
Identify the Purpose Before You Make Headgear
Before gathering supplies, clearly define the type of headgear you plan to create. The design and fabric choice depend on its intended use.
Common types of fabric headgear include:
- Decorative headbands
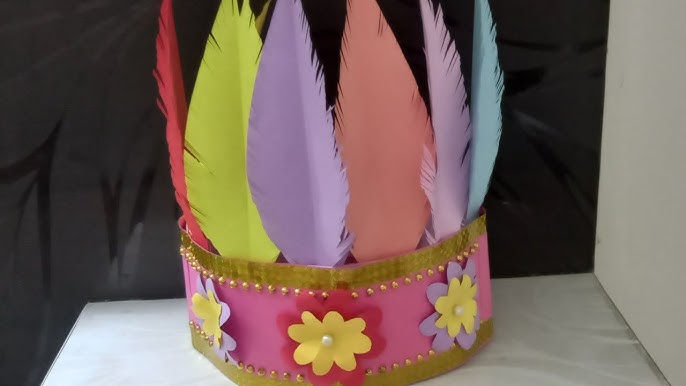
- Costume crowns or themed pieces
- Sports-style fabric wraps
- Cultural or traditional head wraps
If you want to Make Headgear for daily wear, lightweight cotton or jersey fabric works well. For costume pieces, felt or foam-backed fabric may provide better structure. Traditional wraps may require longer pieces of breathable fabric for tying.
Understanding the purpose ensures you select materials that balance comfort, durability, and appearance.
Gather Materials and Tools
To Make Headgear using fabric, you will need:
- Fabric of your choice
- Measuring tape
- Scissors
- Needle and thread or a sewing machine
- Elastic band if needed
- Pins or fabric glue
Choose breathable fabric if the headgear will be worn for extended periods. Cotton, linen, or soft blends help prevent discomfort. Elastic can improve fit and flexibility, especially for headbands.
Before cutting, wash and iron the fabric to remove wrinkles and allow for shrinkage.
Measure and Cut the Fabric Correctly
Accurate measurements are essential when you Make Headgear.
Use a measuring tape to measure around the circumference of the head. Keep the tape snug but not tight. Add approximately 2 centimeters for seam allowance if you plan to sew the edges.
For a simple headband:
- Cut a strip about 8 to 12 centimeters wide
- Adjust length based on your head measurement
For a wrap-style headpiece:
- Cut a longer and wider piece to allow tying
- Ensure the width suits the desired coverage
Make sure the edges are straight before moving to the next step. Clean cuts create a more professional finish.
Sew and Assemble the Headgear
Once your fabric is cut, you can begin assembly.
Fold the strip lengthwise with the right sides facing inward. Sew along the long edge to form a tube. Use straight stitching for a clean seam.
After sewing, turn the fabric inside out so the seam is hidden inside. Press lightly with an iron to smooth the shape.
If you want stretchable headgear, cut a short piece of elastic. Insert the elastic into the ends of the fabric strip and secure it with stitching before closing the ends. This method allows the headgear to expand slightly while maintaining a secure fit.
For wrap-style headgear, hemming the edges may be sufficient without adding elastic.
Add Decorative Elements
If you want to Make Headgear more stylish or thematic, you can add decorative touches.
Popular additions include:
- Beads or sequins
- Fabric flowers
- Decorative stitching
- Ribbons or bows
Attach decorations securely to prevent them from falling off during use. Hand-stitch heavier items instead of using glue for stronger hold.
When adding embellishments, maintain balance. Overloading one side can cause discomfort or uneven weight.
Tips for a Professional Finish
To Make Headgear that looks polished:
- Use matching thread for cleaner seams
- Press seams flat after sewing
- Trim excess fabric from edges
- Double-stitch stress points such as elastic joins
If you are new to sewing, practice on scrap fabric before working on your final piece.
Additionally, ensure comfort remains a priority. Avoid sharp decorations and tight elastic. Headgear should sit securely without causing pressure or irritation.
Customizing Fit and Style
You can adjust size and style based on preference. Narrow strips create subtle headbands, while wider pieces offer bold fashion statements.
If making headgear for children, measure carefully and avoid small detachable decorations. Safety should always come first.
By following these simple steps, you can confidently Make Headgear tailored to your needs. Whether for fashion, costume, or cultural wear, fabric headgear allows creative freedom while remaining practical and comfortable.


